
Social media is all about grabbing attention, sparking interest, and leaving a lasting impression. It’s your chance to tell your story visually, and a little effort can go a long way. If you’re looking to make your content stand out, Photoshop is your new best friend.
Ahead we’ll talk about how to use Photoshop to enhance your social media posts and offer tips for using Photoshop for digital marketing. Don’t worry—this post is safe for Adobe Photoshop for beginners!
We’ll also share some Adobe Photoshop tricks specifically for Instagram—the leading visual platform—and tips on how to stand out on Instagram. Ready to up your Photoshop game? Keep reading.
These easy-to-follow Photoshop for digital marketing tips can help you create standout images for social media, your website, ads, and more.
Bright, vibrant colors instantly draw attention. Use Photoshop’s color correction tools to make your images pop. Play with the Hue/Saturation and Color Balance settings to find a balance that aligns with your brand’s vibe.
Want your posts to be shareable? Add catchy quotes or your logo as a watermark. Photoshop’s text tools let you choose from endless fonts and styles. Just make sure the text doesn’t overwhelm the image—less is often more.
Layer masks can be intimidating at first, but learning how to use them is worthwhile. Want to blend two photos seamlessly or add a subtle glow to your subject? Layer masks let you edit non-destructively so you can experiment without fear.
Not a Photoshop pro? No problem. If you’re looking for Adobe Photoshop for beginners, “presets” and “actions” are your go-to editing tools. From creating dreamy filters to batch resizing images, these tools save time while keeping your feed cohesive.
Consistency builds recognition. Stick to a specific color palette, font style, and tone for all your visuals. Use Photoshop’s libraries to save your brand assets and apply them effortlessly across posts.
Photoshop lets you place your content into realistic scenarios. Want to show off your design on a coffee cup or billboard? Mockups add a professional touch that wows your audience.
Sometimes, less is more. Negative space directs focus to your subject and makes your design feel clean and professional. Don’t be afraid to let your visuals breathe!
Instagram’s filters are great, but Photoshop takes it up a notch. Add subtle blur, lighting effects, or even vintage grain for that polished, unique touch.
Custom illustrations, stickers, and doodles on your posts are great ways to use Photoshop for digital marketing. These little additions make your content instantly recognizable and highly shareable.
Most people scroll social media on their phones, so your images need to look great on smaller screens. Use Photoshop’s Export for Web feature to optimize file sizes while maintaining high resolution and stick to vertical or square formats for better mobile visibility.
Now let’s put some of what we’ve learned into practice with this simple Photoshop for social media tutorial. Follow the steps below!
Let’s start with gradient maps. This tool is a quick way to add color to any photo or asset. Also, if your brand has a specific color palette, this is an easy way to customize your social media content.
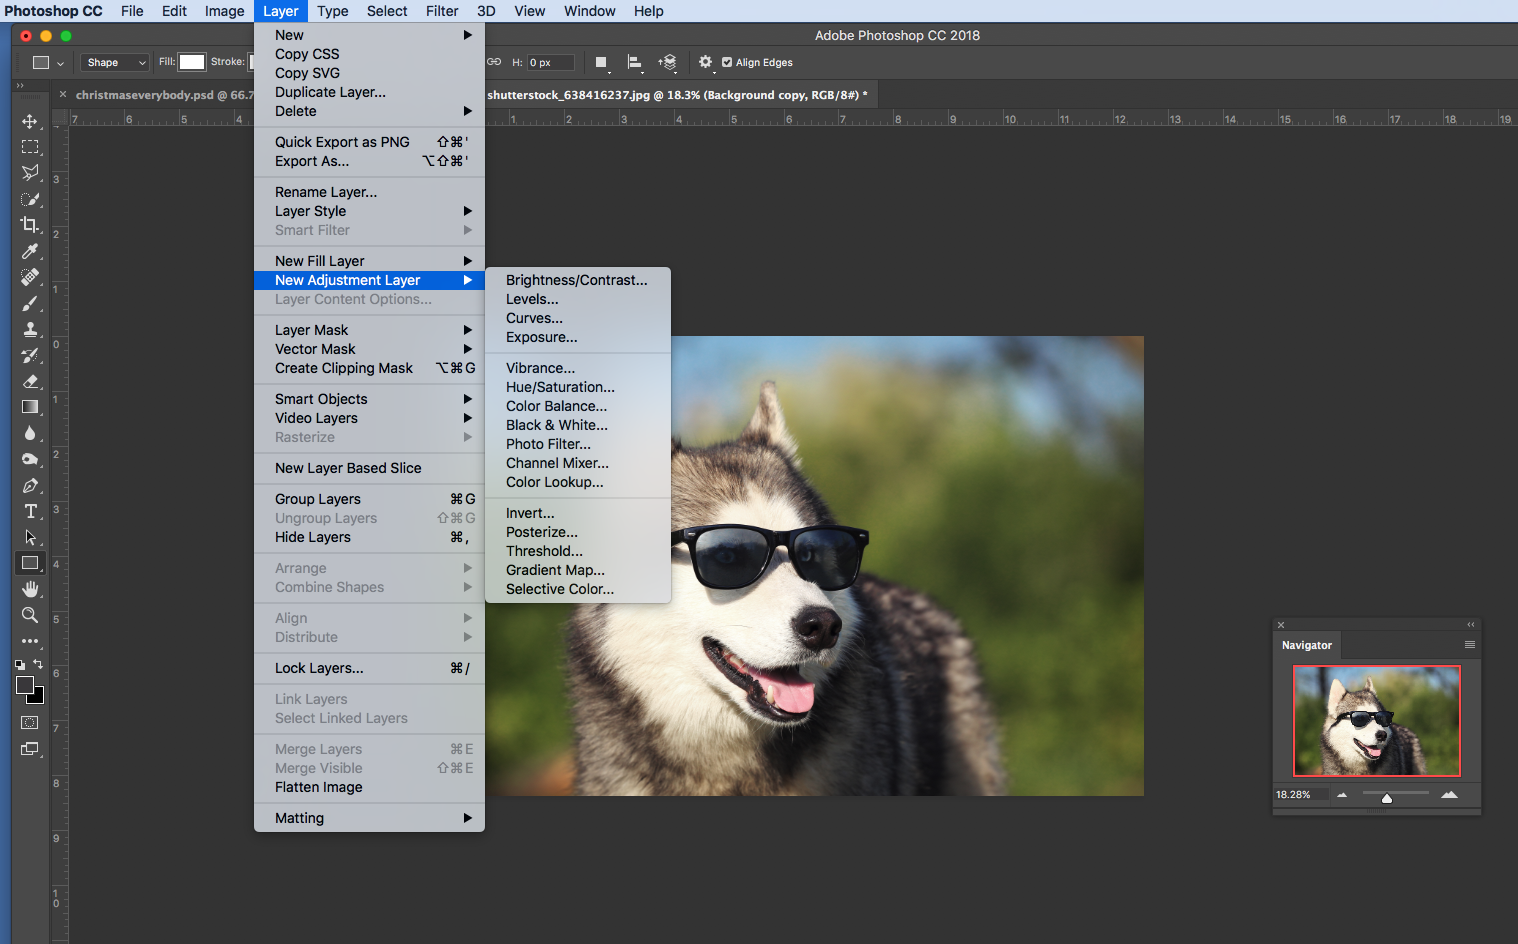
Let’s start with an image of a dog wearing sunglasses.

Go to the menu bar at the top of your screen and select Layer -> New Adjustment Layer -> Gradient Map (below).
Next, select the colors you want to apply to your image. You’ll see Photoshop has color combinations built in, but you can easily select any colors you like and “map” them to the image.
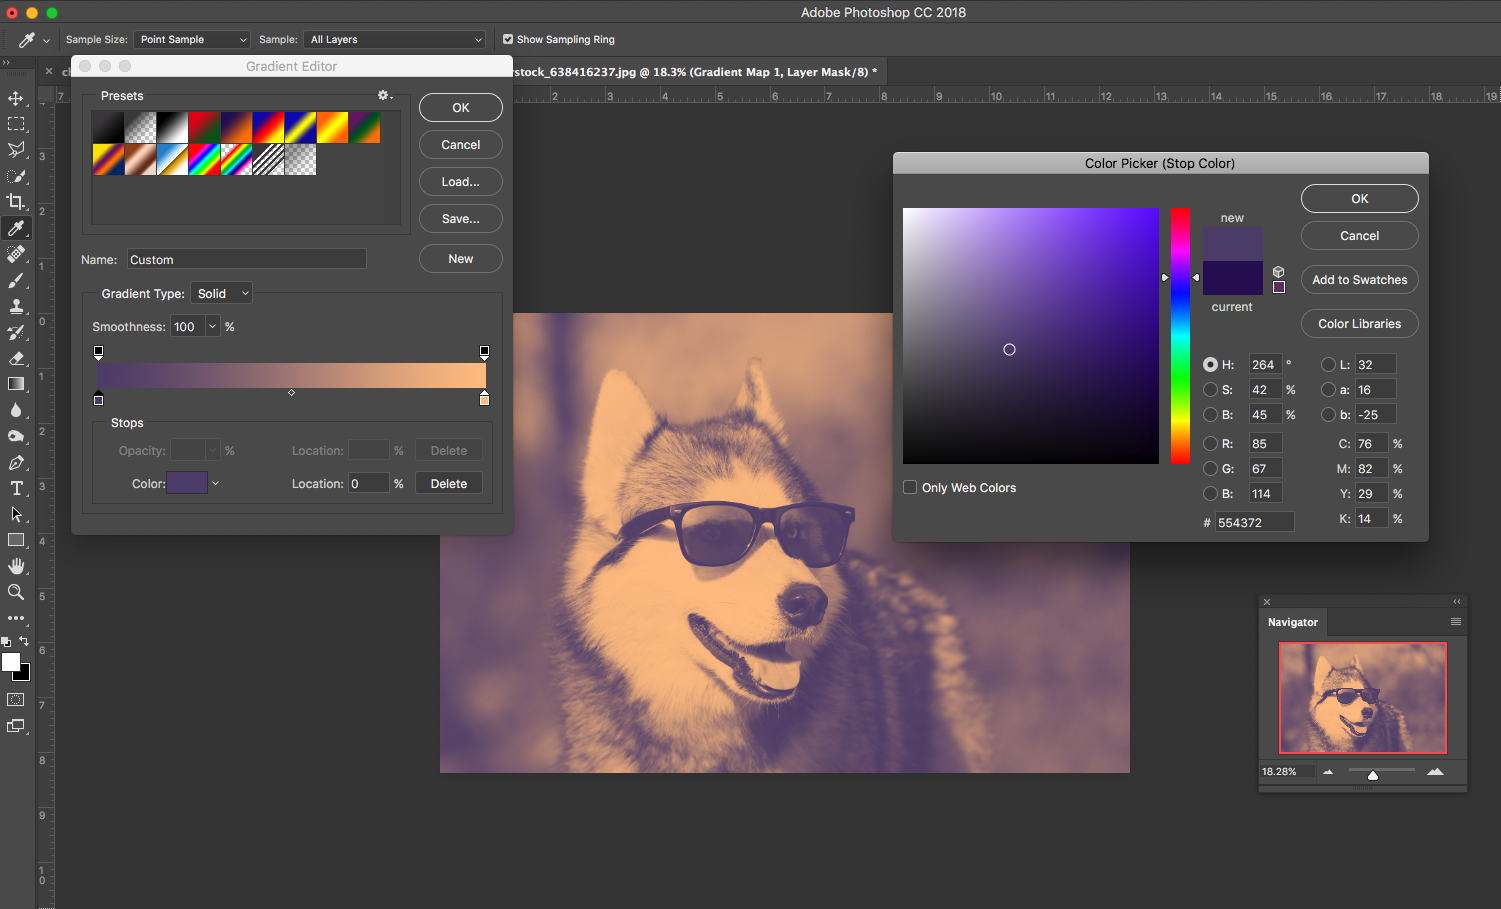
Here we see the finished product!

Easy!
Another way to quickly boost the visual appeal of an image is to add a simple branding element, like a border. Let’s say we have a square image like below.

Let’s create a white rectangle and center it over the image.

Now go to the menu bar and select Layer -> Rasterize -> Layer.
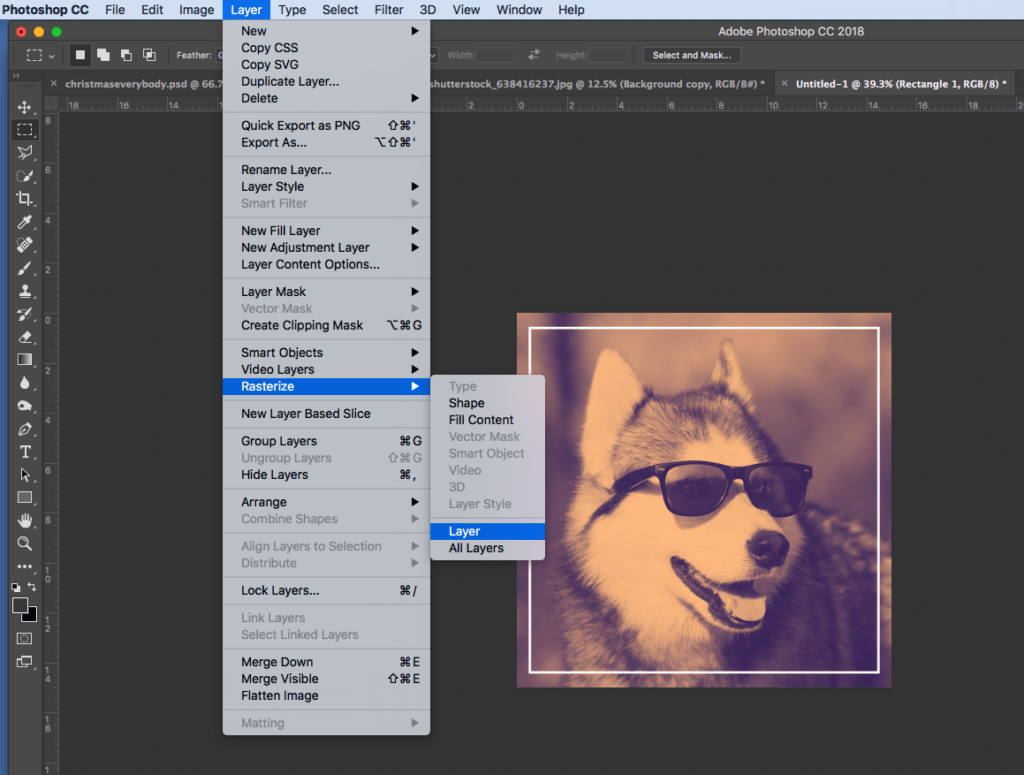
This last step allows you to erase a portion of the rectangle. I like to erase the portion of the rectangle that covers the focus of the image. This will give it some nice depth.

Whoa! It looks like the dog is *in front* of the rectangle. In no time, we’ve added a simple element to our image that will, hopefully, stand out online.
This information is not a technique or a tip—just a reminder that Typekit is your friend. If you have a Photoshop subscription, that means you have access to Typekit, a site where you can browse thousands of high-quality fonts and download many of them for free.
Let’s say we have an image that involves type like below.

Now, Helvetica is a nice font with a wide range of practical applications. But it’s not very exciting. If you’ve never explored Typekit before, go to the menu bar and select Type -> Add Fonts from Typekit.
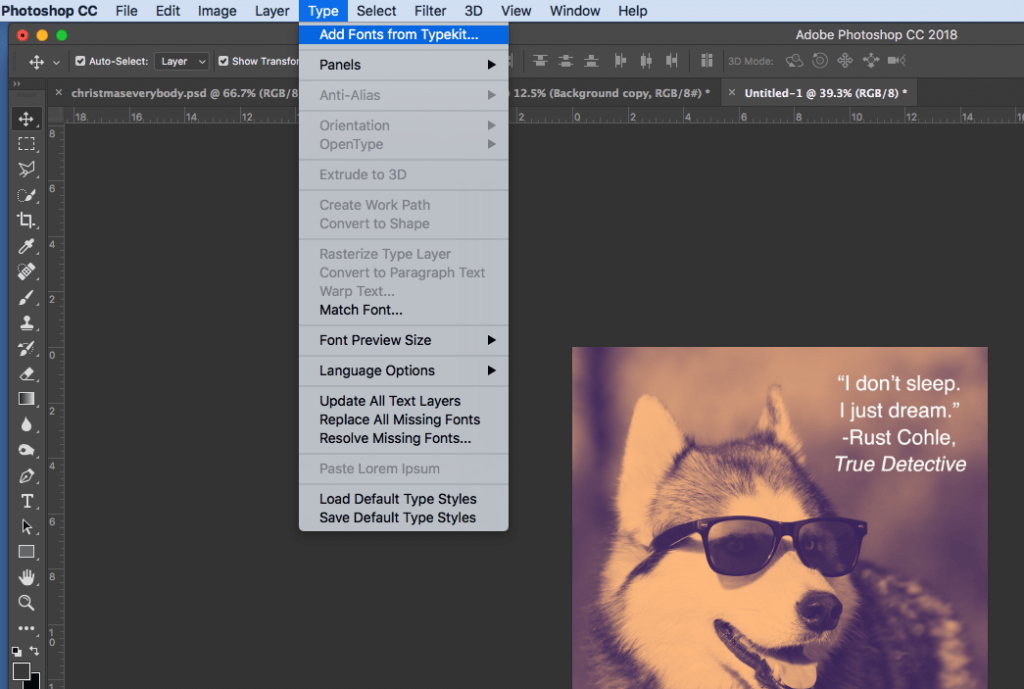
You can spend time experimenting with different fonts, but it doesn’t take long to find something that makes our image a little more interesting.

We couldn’t close this post without touching on the elephant in the room—the Grand Poobah of visuals on social media. Of course we’re talking about Instagram!
Insta is all about aesthetics, so your content needs to shine on the platform. You can use Photoshop to create unique, scroll-stopping visuals that tell your story. To stand out on Instagram, you should:
The more cohesive and polished your feed looks, the more likely you are to grab—and hold—your audience’s attention. In the next section we’ll go into more detail about some of the tricks you can use in Photoshop to make your Instagram posts pop.
Want to create content that stops the scroll? These Photoshop tricks will take your Instagram visuals to the next level:
Instagram loves specific dimensions. Getting them right is key to achieving a professional look. Use Photoshop’s crop tool to tailor your images to Instagram’s favored formats, such as square (1080×1080) or portrait (1080×1350).
These dimensions not only display perfectly but also maximize screen real estate, especially on mobile devices.
Pro tip: Use Photoshop’s “Rule of Thirds” grid while cropping to keep your composition balanced and engaging.
Gradients are a simple way to make your images pop. Whether you’re enhancing a flat image or creating a dreamy background, Photoshop’s gradient overlay feature lets you add depth and vibrancy.
You can layer gradients over photos for a modern, artistic effect or use them as stylish backdrops for text or product highlights. Experiment with colors that align with your brand to create a cohesive look.
Seamless carousel posts are a fantastic way to engage your audience and tell a story. In Photoshop, you can design a single, wide image (e.g., 3240×1080 for three slides or 5400×1080 for five) and then slice it into perfectly sized squares using the Slice Tool.
This creates a smooth flow as users swipe through your carousel. Add subtle design elements, like overlapping text or graphics, to connect the slides visually and make your post irresistible to swipe through.

Need help creating images that look polished and professional yet irresistible? Great visuals don’t just happen—it takes time and know-how to create images that grab attention.
If you don’t have the time or resources to invest in perfecting your social media images, the team at Socialfly is here to help. Creating stunning visual assets and managing social media is our specialty—along with paid media and influencer marketing.
Let our team of digital natives take your social media posts to new heights. Get in touch today to chat!